Guide to deep cleaning ovens at home without damage
If your oven has reached that stage where the glass looks hazy, the bottom smells faintly burnt even when it is off, and every roast seems to leave behind another sticky mystery, you are in the right place. This guide to deep cleaning ovens at home without damage walks you through a safe, practical way to get the job done without scratching enamel, wrecking seals, or making the appliance work harder than it should.
Truth be told, oven cleaning is one of those chores most people put off until smoke starts drifting out during dinner prep. But with the right method, it does not have to be harsh, messy, or risky. You will learn what actually causes damage, which products are safe, how to clean stubborn grease without overdoing it, and when it makes more sense to call in help rather than push your luck.
One small thing before we dive in: patience beats brute force every time. That applies more than people think.
Table of Contents
- Why this matters
- How the cleaning process works
- Key benefits and practical advantages
- Who needs this and when it makes sense
- Step-by-step guidance
- Expert tips for better results
- Common mistakes to avoid
- Tools, resources and recommendations
- Law, compliance, standards, or best practice
- Options, methods, or comparison table
- Case study or real-world example
- Practical checklist
- Conclusion
- Frequently asked questions
Why Guide to deep cleaning ovens at home without damage Matters
A clean oven is not just about appearances. Grease, carbonised food spills, and baked-on residue can affect cooking performance, cause smoke, create lingering smells, and make heat distribution less even. If you have ever opened the door and been hit with that hot, stale, slightly acrid smell, you already know the problem.
Deep cleaning matters because ovens are built from a mix of materials that react differently to heat, chemicals, and abrasion. The cavity lining, glass door, racks, fans, hinges, seals, knobs, and electronics all need different handling. A heavy-handed clean can leave scratches on enamel, strip coatings, or damage the rubber seal that helps the oven hold temperature.
There is also a hygiene angle. In kitchens, especially busy family kitchens, splattered food and baked-on grease can attract more mess over time and make regular cooking feel grim. For many homes, the oven is used for trays, pizzas, joints, pastries, and the odd "just bung it in" meal. It gets worked hard. No surprise it needs proper care.
If you are already planning a broader kitchen refresh, it can make sense to pair oven cleaning with kitchen cleaning or a wider deep cleaning visit, especially after a long stretch of neglect. The oven rarely gets dirty in isolation. Let's face it, the whole cooking zone usually tells the story.
How Guide to deep cleaning ovens at home without damage Works
The safe way to deep clean an oven is to loosen grease gradually, lift residue without scratching, and keep moisture away from sensitive components. It sounds simple, and mostly it is. The trick is matching the method to the material and the level of grime.
Most domestic ovens have enamel interiors, tempered glass doors, metal racks, and seals around the edges. Some include self-clean settings, catalytic liners, or steam-clean options. Others are straightforward manual-clean ovens. In all cases, the same principles apply:
- Use low-abrasion tools.
- Let cleaning solutions sit long enough to work.
- Keep liquid away from vents, heating elements, and control panels.
- Remove loose debris before scrubbing.
- Rinse thoroughly so no residue is left behind.
The process is not about blasting everything with the strongest product you can find. In fact, that is usually how damage starts. A gentle paste, careful wiping, and repeat passes are often more effective than one aggressive attack. A bit boring? Maybe. Effective? Absolutely.
If you are comparing whether to do it yourself or book professional oven cleaning, the choice often comes down to time, risk, and build-up level. For moderate grime, a methodical home clean works well. For thick, burnt-on deposits, the job can be more awkward than it first looks. That is where a specialist oven cleaning service may save you a headache.
Key Benefits and Practical Advantages
Deep cleaning an oven safely has several real benefits beyond a shiny finish. The obvious one is cleanliness, but there are a few others worth calling out.
- Better cooking results: Removing heavy residue helps heat circulate more evenly and reduces smoky flare-ups.
- Less odour: Old grease and food carbon can smell when heated, especially during preheating.
- Longer appliance life: Keeping seals, fans, and surfaces in good condition helps reduce wear.
- Safer cooking environment: Less built-up grease means less chance of sudden smoking or small flare-ups.
- More pleasant kitchen routine: A clean oven makes the whole space feel easier to use. You notice it immediately.
There is also a practical financial benefit. A well-maintained oven is less likely to need avoidable repairs caused by residue around hinges, seals, or glass. Nobody wants to pay for a fix that could have been avoided with a careful clean and 20 extra minutes of patience.
For rented homes, a clean oven can also matter at the end of a tenancy. Landlords and tenants may have different expectations, but ovens are one of the first places a property inspection looks. If you are moving out, pairing oven care with end of tenancy cleaning can help cover the whole checklist properly.
Who This Is For and When It Makes Sense
This guide is for anyone who wants a cleaner oven without scratching the interior, damaging the seal, or leaving a chemical smell behind. That includes busy families, home cooks, landlords, tenants, and anyone who just got tired of seeing the same baked-on splatter every time they open the door.
It makes sense to deep clean at home if:
- the oven is dirty but still in decent condition;
- you can remove the racks and access the cavity safely;
- there is no major damage, electrical fault, or broken seal;
- you have time to work methodically;
- the build-up is manageable with standard cleaning products.
It may be better to stop and reassess if the oven has damaged wiring, a cracked glass door, severe rust, or signs of a more serious fault. In that case, cleaning is not the first issue. Safety is. No one wants a quick tidy-up turning into a repair call.
Some people also choose professional help simply for convenience. If your week is already packed, or you are juggling a move, renovation, or family life, outsourcing can be a sensible decision rather than a luxury. A proper oven cleaning service can take the pressure off and produce a more consistent result when the oven is heavily soiled.
Step-by-Step Guidance
Below is a practical, damage-conscious method you can use for most standard domestic ovens. Adjust it if your manufacturer's instructions say something different. That part matters. Always.
1) Let the oven cool fully
Never start while the oven is warm unless you are using a product specifically designed for warm surfaces. Heat can make grease smear, cause fumes from cleaners, and increase the risk of burns. Wait until everything is fully cool to the touch.
2) Remove loose debris
Use a dry paper towel or a soft cloth to lift out crumbs, loose ash, and any obvious bits of food. This avoids turning debris into a greasy paste. A small vacuum with a brush attachment can help around the floor edges, but keep it clear of any moisture.
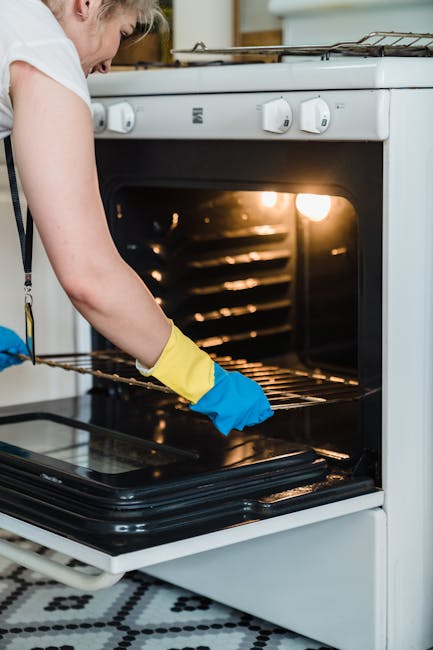
3) Take out racks and trays
Remove shelves, trays, and side rails if they are designed to come out. These parts can usually be cleaned separately in a sink or large tub. Do not force anything that feels stuck. A stubborn rail does not need heroics.
4) Protect sensitive areas
Cover fan openings, gas jets, exposed elements, digital controls, and vents with a dry cloth or follow the appliance guidance. The idea is to keep liquid and paste away from parts that should not be soaked.
5) Apply a safe cleaning method
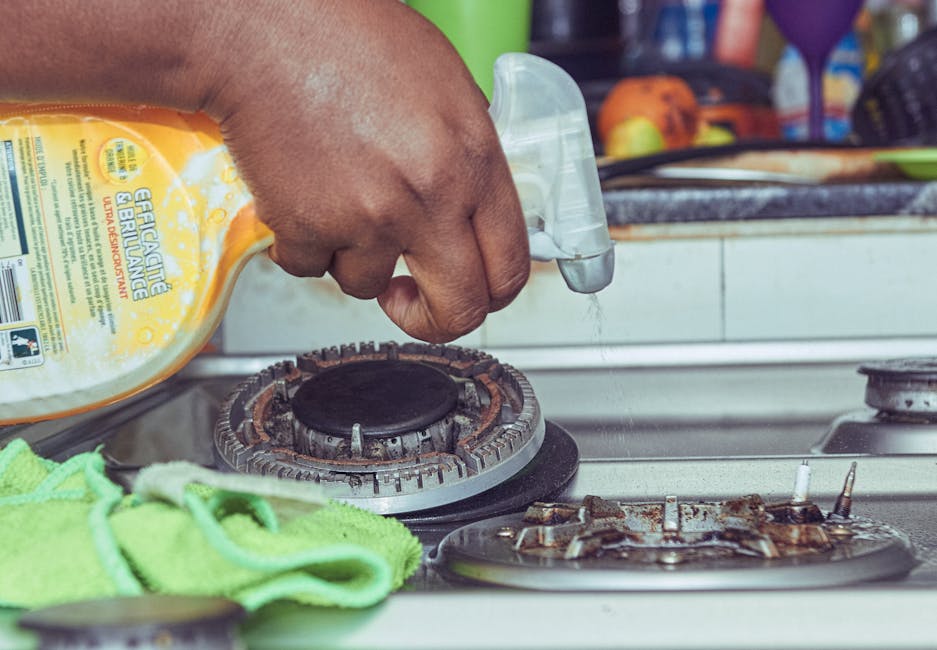
For most home ovens, a mild paste made from bicarbonate of soda and a small amount of water works well on baked-on grease. Spread it on the interior surfaces, avoiding seals and heating elements. Leave it to sit so it can soften residue. If you prefer a commercial oven cleaner, choose one that clearly states it is suitable for your oven type and follow the timing exactly.
Do not overapply. More product does not mean more power. It often just means more wiping later.
6) Clean the door glass carefully
The glass door usually needs a gentler touch than the cavity. Use a soft cloth and a non-scratch cleaner. If grime sits between panes, check whether the door model allows safe access. If not, do not pry it apart. That is a quick route to cracked clips and regret.
7) Wipe and repeat
Use a damp cloth to remove the loosened grime. You may need to repeat the application on stubborn patches. Take your time. A second pass is normal, not a failure.
8) Clean racks separately
Soak racks in warm water with a little washing-up liquid, then scrub with a non-scratch pad. For heavier build-up, a long soak is better than forceful scraping. If you have a utility sink, that makes life easier. If not, a bath lined carefully with an old towel can work, though not exactly glamorous.
9) Dry thoroughly
Dry all surfaces before reassembling. Moisture left behind can lead to streaking, odours, or a slightly steamy first heat-up. Then run the oven briefly empty at a low temperature to finish drying and clear any remaining smell.
If you want a broader home routine after the oven is done, you might also look at one-off cleaning for a whole-property reset. Sometimes one job leads naturally into another. It happens.
Expert Tips for Better Results
The difference between a decent clean and a really good one usually comes down to technique, not muscle. A few small habits save a lot of trouble later.
- Work in stages: do not expect one pass to solve a year of build-up. Let products sit, then return.
- Use microfiber cloths: they lift residue better than rough sponges and are less likely to scratch.
- Spot-test if unsure: if you are using a new cleaner, test a small hidden patch first.
- Keep water under control: damp cloths are safer than soaked ones around oven openings and electronics.
- Focus on the hinge area: grime often collects there and gets missed.
A helpful habit is to wipe spills while the oven is still warm but not hot, after cooking has finished and the appliance has cooled enough to handle safely. That tiny bit of maintenance reduces the need for a major deep clean later. Not every time, obviously. Life gets busy. But often enough to matter.
Another tip: open a window. Even mild cleaners can smell strong in a closed kitchen, and hot residue can be a bit whiffy. A little airflow makes the process more comfortable and safer.
If your oven is part of a full kitchen refresh, pairing it with house cleaning or spring cleaning can make the whole home feel fresher rather than stopping at one appliance and leaving the rest to glare at you.
Common Mistakes to Avoid
Most oven damage happens because someone is in a hurry. Fair enough. Nobody enjoys scrubbing stuck-on lasagne from a Sunday roast disaster. But the shortcuts can be costly.
- Using metal scrapers on enamel or glass: this can leave permanent marks.
- Spraying cleaner everywhere: too much liquid can get into vents, seals, or controls.
- Leaving caustic cleaner on too long: strong products can dull finishes if they dry out or overstay their welcome.
- Ignoring the manufacturer's guide: self-cleaning or catalytic ovens need different treatment.
- Scrubbing seals aggressively: damaged seals reduce efficiency and can affect heat retention.
- Reassembling while damp: trapped moisture can lead to odour and streaking.
One surprisingly common mistake is trying to clean every part the same way. The oven interior, racks, glass, knobs, and seals are not identical surfaces. Treat them the same and something usually gives. Usually the thing that costs money.
Another thing to watch: overly fragranced products. They may smell "clean" for a bit, but if residue is left behind, the scent can mix with heat and become unpleasant. Smell is not a cleaning result. It is just smell.
Tools, Resources and Recommendations
You do not need a trolley full of specialist kit. A good oven clean at home usually relies on a short, sensible list.
| Tool or product | Best use | Why it helps |
|---|---|---|
| Microfiber cloths | Wiping and buffing | Lift grime gently and reduce scratching |
| Soft sponge or non-scratch pad | Loosening residue | Good for stubborn patches without harsh abrasion |
| Bicarbonate of soda | Gentle paste for baked-on grease | Useful for softening grime over time |
| Warm water and washing-up liquid | General cleaning and rack soaking | Simple, familiar, and effective for lighter soil |
| Plastic or silicone scraper | Careful lifting of softened residue | Less risky than metal tools |
| Rubber gloves | Hand protection | Useful when using stronger cleaners or long soak times |
| Old towel or sheet | Protecting floors and work surfaces | Makes cleanup easier and catches drips |
If you are buying a commercial cleaner, check that it is appropriate for your oven type. Some products are not suitable for self-cleaning, catalytic, or certain stainless-steel surfaces. Read the label properly, not just the front. That tiny detail saves a lot of trouble.
For homes that prefer a wider cleaning solution rather than tackling each area one by one, a reputable cleaning company may offer a more joined-up approach. And if you are comparing service levels, looking at oven cleaning alongside general kitchen care can help you decide what is most useful right now.
Law, Compliance, Standards, or Best Practice
For most homeowners, oven cleaning is a household maintenance task rather than a regulated process. Still, best practice matters, especially where safety, ventilation, and product use are concerned.
In the UK, the safest approach is to follow the appliance manufacturer's instructions and product labels carefully. This is not the fun part, admittedly, but it is the part that helps avoid damage and keeps warranties intact where relevant. If a product says it is not suitable for certain surfaces, take that seriously.
For rented properties, keep in mind that tenants are generally expected to leave appliances reasonably clean at the end of a tenancy, subject to fair wear and the tenancy agreement. Landlords, meanwhile, are responsible for ensuring appliances are safe and fit for use. If you notice a faulty seal, broken glass, or electrical issue while cleaning, stop there and get the issue checked rather than trying to scrub your way through it.
For cleaning businesses and property managers, safe handling practices also matter. Using gloves, ensuring ventilation, and storing chemicals correctly are standard good practice. If you are dealing with repeated oven cleaning as part of a larger property service, it is wise to check relevant internal safety procedures and insurance expectations. Small practical steps, but important ones.
If sustainability is part of your decision-making, consider using less aggressive products and reusing cloths responsibly where hygienic. Some households also prefer to plan periodic cleaning alongside broader recycling and sustainability habits so the job feels a little less wasteful overall.
Options, Methods, or Comparison Table
Different oven-cleaning methods suit different situations. There is no single perfect answer. The right choice depends on how dirty the oven is, what finish it has, and how much effort you want to put in.
| Method | Best for | Pros | Watch out for |
|---|---|---|---|
| Bicarbonate paste | Moderate grease and general upkeep | Gentle, low cost, widely available | Needs time and may need repeat passes |
| Commercial oven cleaner | Heavy baked-on residue | Fast acting and powerful | Can be harsh if misused |
| Steam or warm damp cleaning | Light grime and routine freshening | Minimal chemical use | Not strong enough for deep carbon build-up |
| Professional service | Severe build-up or time-poor households | Thorough, convenient, less physical effort | Costs more than DIY |
For most homes, the bicarbonate route is the safest starting point. It is not always the fastest, but it is kind to surfaces and gives you more control. If the oven is very neglected, a professional clean may be less stressful than fighting a losing battle in your kitchen for three hours straight. We have all been there with one household task or another.
If you are also dealing with a generally busy home and want help with more than the oven, options like domestic cleaning or home cleaning can make more sense than trying to piece together separate jobs.
Case Study or Real-World Example
Picture a fairly typical London flat kitchen on a Friday evening. The oven had been used for tray bakes, frozen chips, a couple of roast dinners, and one overly ambitious lasagne that bubbled over. Nothing dramatic. Just the usual slow build-up. The door glass looked cloudy, the racks were tacky, and there was a burnt smell whenever the oven heated above normal.
The owner decided not to attack it with a wire pad. Sensible. Instead, they removed the racks, wiped out loose crumbs, and used a bicarbonate paste on the cavity and a gentle cleaner on the glass. The paste sat overnight, which is often the point where the magic happens, though "magic" is maybe too generous. More like chemistry and patience.
The next morning, the residue wiped away in stages. Not all at once, because reality rarely works that way. The stubborn corners needed a second round, but the enamel stayed intact, the glass was clean, and the oven no longer smoked on preheat. The smell improved too. Not lemon-fresh and showroom-perfect, just normal. Which, in a home kitchen, is a win.
That sort of result is realistic for many households. Not effortless. Not dramatic. Just properly done.
Practical Checklist
Use this simple checklist before and during the clean. It keeps things organised, and honestly, it stops that awkward mid-clean moment where you forget whether the racks are still soaking.
- Oven fully cooled
- Power switched off if needed and safe to do so
- Manufacturer instructions checked
- Racks, trays, and loose parts removed
- Floors and nearby surfaces protected
- Loose crumbs and debris removed first
- Safe cleaner or paste applied sparingly
- Seal, vents, fan openings, and controls protected from excess moisture
- Residue lifted gently with non-scratch tools
- Door glass cleaned with care
- All surfaces wiped and rinsed
- Parts dried fully before reassembly
- Short test heat run completed if appropriate
If any step starts to feel fiddly or risky, slow down. That is usually the correct move.
Conclusion
A careful oven deep clean at home is absolutely doable, and it does not need to be destructive or complicated. The safest approach is usually the calmest one: remove loose debris, use a gentle but effective product, avoid harsh scrubbing, and give the process enough time to work. That is the real secret, if there is one.
Done properly, you will get a cleaner oven, less smoke, better cooking performance, and fewer headaches later. Done too aggressively, you can scratch surfaces, damage seals, or leave behind more problems than you started with. So the goal is simple: be thorough, be patient, and be kind to the appliance.
If your oven needs more than a routine refresh, or you would rather not spend your weekend kneeling in front of a greasy door with a sponge and a hopeful expression, booking help can be a very sensible move. Either way, a clean oven changes the feel of a kitchen more than people expect. There is something quietly satisfying about it. A proper reset.
Get a free quote today and see how much you can save.
Frequently Asked Questions
How often should I deep clean my oven at home?
For many households, a deep clean every few months is enough, with lighter wipe-downs in between. If you roast often, cook with splatter-prone dishes, or use the oven daily, you may need to do it more often. The best cue is usually smell, smoke, or visible build-up.
What is the safest thing to use for deep cleaning an oven without damage?
A mild cleaning paste, soft cloths, warm water, and non-scratch tools are the safest starting point for many ovens. The exact choice depends on the oven type and the manufacturer's instructions. If you are unsure, start gently rather than reaching for the strongest product on the shelf.
Can I use baking soda and vinegar together on oven grease?
You can, but the fizz is often more dramatic than the actual cleaning effect. Baking soda does most of the work as a mild abrasive and deodoriser. Vinegar can help with some residue, but mixing the two in the hope of a super-cleaning reaction is usually overrated.
Will oven cleaner damage the enamel inside my oven?
It can if the product is not suitable for your oven type, is left on too long, or is used too aggressively. Always check the label and avoid heavy scrubbing with abrasive pads. A careful application is far safer than overdoing it.
How do I clean oven glass without scratching it?
Use a soft microfiber cloth or non-scratch sponge with a gentle cleaner. Avoid blades, steel wool, or sharp scrapers. If the grime is stubborn, let a suitable cleaner sit for longer rather than scrubbing harder. That is usually the better path.
Should I remove oven racks before cleaning?
Yes, if the design allows it. Racks are much easier to clean separately and removing them gives you better access to the cavity. It also reduces the chance of dragging grit across the interior surfaces.
Is steam cleaning enough for a really dirty oven?
Usually not on its own. Steam cleaning is good for light grime and freshening up, but heavy, baked-on residue normally needs a longer soak or a more targeted cleaner. Think of steam as maintenance, not a miracle.
How can I avoid making my oven smell after cleaning?
Rinse or wipe away all residue, dry the oven thoroughly, and run it briefly empty at a low heat if the manufacturer allows it. Leftover cleaner is usually the cause of a lingering smell, not the cleaning itself.
What should I do if the oven seal looks damaged?
Stop cleaning that area aggressively. A damaged seal can affect cooking performance and safety, so it is better to have it inspected or replaced than to keep scrubbing. Cleaning is not the answer to everything, unfortunately.
Is professional oven cleaning worth it?
It can be, especially if the oven is heavily soiled, you are short on time, or you want a more thorough result without the hassle. If the appliance is in good condition and the grime is moderate, DIY cleaning may be enough. It really depends on your situation.
Can I deep clean a self-cleaning oven the same way?
Not exactly. Self-cleaning ovens often need different handling because their high-heat cycle and coatings can be affected by the wrong products. Check the manual before using any cleaner or method. The appliance knows what it wants, more or less.
What if I find rust or damaged parts while cleaning?
Stop and assess the issue before continuing. Surface rust, cracked glass, damaged wiring, or broken hinges are not just cleaning problems. They can point to a repair need, and forcing the clean could make things worse. Safety first, always.
If you are based in the capital and want support beyond a one-off DIY tidy-up, you may also find it useful to explore London cleaning services alongside the right level of home care for your schedule.