Step by step upholstery cleaning for common fabrics
If your sofa looks a bit tired, has a mystery mark on the arm, or is holding onto that not-quite-fresh smell from everyday life, you are in the right place. Step by step upholstery cleaning for common fabrics is not about blasting everything with the same product and hoping for the best. It is about reading the fabric, choosing the right method, and working gently enough to clean without shrinking, fading, or flattening the pile.
That sounds obvious, but in practice plenty of people get caught out. A linen chair needs a different touch from microfiber. Wool blend seating is not the same as cotton. Velvet can look brilliant after cleaning or patchy and crushed if handled badly. This guide walks you through the process in a clear, practical way, so you can decide what is safe, what is worth doing yourself, and when a professional touch makes more sense. Truth be told, that little bit of care up front saves a lot of bother later.
One quick note before we begin: always test in an out-of-sight area first. It is the boring step people skip. It is also the step that saves the sofa.
Table of Contents
- Why Step by step upholstery cleaning for common fabrics matters
- How Step by step upholstery cleaning for common fabrics works
- Key benefits and practical advantages
- Who this is for and when it makes sense
- Step-by-step guidance
- Expert tips for better results
- Common mistakes to avoid
- Tools, resources and recommendations
- Law, compliance, standards, or best practice
- Options, methods, or comparison table
- Case study or real-world example
- Practical checklist
- Conclusion
- Frequently asked questions
Why Step by step upholstery cleaning for common fabrics Matters
Upholstery takes more wear than most people realise. It picks up skin oils, crumbs, pet hair, dust, drink spills, and the slow build-up of everyday grime from hands and elbows. Left alone, that build-up dulls the fabric and can make a room feel less fresh, even if the rest of the house is tidy. In a busy London home, with damp coats by the door and the heating on and off through the seasons, soft furnishings can start looking a bit flat very quickly.
The reason a step by step approach matters is simple: fabrics behave differently. Some are forgiving. Some are not. If you use too much water on a delicate fabric, you can leave water rings, stiff patches, or lingering damp smells. If you scrub too hard, you may distort the weave or rough up the surface. And if you clean without removing dry soil first, you often turn dust into a muddy smear. Not ideal.
There is also the comfort factor. Clean upholstery feels better, looks better, and often lasts longer because dirt is not grinding into the fibres every time someone sits down. That is a practical win, not just a cosmetic one.
How Step by step upholstery cleaning for common fabrics Works
At its core, upholstery cleaning is a controlled process: identify the fabric, remove loose debris, treat stains carefully, clean with the least aggressive method that will work, then dry the fabric properly. The order matters. People often jump straight to wet cleaning, but good results usually come from doing the quiet prep work first.
Most upholstery fabrics fall into a few broad categories: natural fibres like cotton and linen, protein fibres like wool, synthetic fibres like polyester and microfiber, and textured fabrics such as velvet or chenille. Each responds differently to moisture, heat, and friction. A fabric care label, if present, should be your first clue. Common cleaning codes generally mean the following: W for water-based cleaning, S for solvent-based cleaning, WS for both, and X for vacuum-only or professional cleaning. If you cannot find the label, be cautious and test first.
In practice, good upholstery cleaning works like a series of small decisions. Do you need dry soil removal only? Is there a water-safe stain? Is the fabric prone to water marks? Will a light foam clean be safer than a wet extraction? Ask those questions before you start. A minute of thinking saves an hour of fixing.
Key Benefits and Practical Advantages
Done properly, upholstery cleaning delivers more than a cleaner look. It can help reduce allergens trapped in fibres, remove unpleasant smells, and keep your furniture feeling more comfortable to use. On a sofa that gets daily use, that difference is noticeable pretty quickly.
- Better appearance: colours look richer once surface grime is removed.
- Longer fabric life: dirt and grit are less likely to wear fibres down.
- Improved hygiene: regular cleaning helps reduce the build-up of dust and spills.
- Odour control: fabric no longer holds onto food, pet, or smoke smells as strongly.
- Safer maintenance: a fabric-specific routine lowers the risk of damage.
There is another practical upside that people often miss: once you know how your upholstery behaves, future maintenance becomes much easier. You stop guessing. You stop over-cleaning. And you stop panicking every time someone drops tea on the armrest.
Who This Is For and When It Makes Sense
This guide is for anyone looking after upholstered furniture at home, from a rented flat in central London to a family house in the suburbs. It is especially useful if you have a mix of fabric types, because the same approach will not suit all of them. If you have pets, small children, or a busy household with food and drink around the sofa, regular upholstery care becomes even more worthwhile.
It also makes sense if you are preparing for guests, moving out, doing a seasonal refresh, or trying to rescue a piece of furniture before replacing it. Sometimes the job is small and simple. A light refresh on a synthetic armchair, for example, is often manageable. Other times, the signs point to a more cautious approach. Deep-set stains, water-sensitive labels, or antique pieces usually deserve extra care, and in some cases professional cleaning is the safer route.
Let's face it, nobody wants to turn a decent sofa into an expensive lesson.
Step-by-Step Guidance
Below is a practical method you can adapt for most common upholstery fabrics. It is deliberately paced. Rushing is where things tend to go wrong.
1. Identify the fabric and check the care label
Start by finding the manufacturer's label. If it is there, follow it. If the label is missing or unreadable, assume the fabric is more delicate than it looks. Cotton and polyester blends are often more forgiving, while linen, wool, and velvet usually need a gentler hand. When in doubt, use as little moisture as possible and test every product first.
2. Vacuum thoroughly
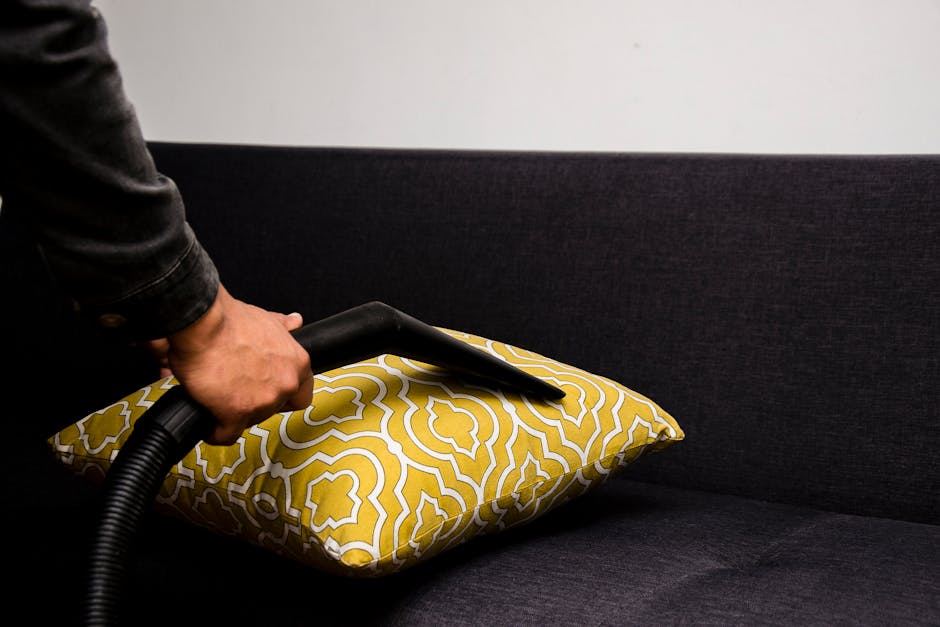
Vacuum the whole piece before using any liquid. Pay attention to seams, creases, under cushions, and the back of the sofa where dust likes to settle. Use an upholstery attachment if you have one. This step removes crumbs, grit, and pet hair so you are not rubbing dirt deeper into the fibres. It sounds simple. It matters more than people think.
3. Treat dry debris and loose marks first
If there is dried mud, pet fluff, or flaky residue, lift it gently before wet cleaning. A soft brush can help. For sticky spots, let them dry and then remove as much as possible without digging at the fabric. Avoid aggressive scraping. That is how snagging starts.
4. Spot test your cleaner
Choose a small hidden area, apply a little cleaning solution, and wait for it to dry fully. Check for fading, darkening, stiffness, or texture change. Some fabrics look fine when damp and only reveal problems once dry, which is annoying, but there we are. Better in a hidden corner than on the front seat cushion.
5. Pre-treat obvious stains
Use the mildest appropriate product for the stain type. Water-based spills often respond to a lightly damp cloth and a small amount of upholstery cleaner. Greasy marks may need a fabric-safe degreasing approach. For protein stains such as milk or food, cool water is usually safer than warm. Avoid soaking. Blot gently from the outside in so the mark does not spread.
6. Clean the fabric according to its type
Cotton: Cotton is often durable, but it can still shrink or water-mark if over-wet. Use a lightly damp cloth or a foam upholstery cleaner. Work in small sections and blot rather than scrub. For woven cotton covers, keep moisture even across the area so you do not get tide marks.
Linen: Linen looks beautiful and can be a little fussy. Use minimal moisture and a gentle cleaner. Blot, do not rub. If linen is untreated or loosely woven, too much water can leave a patchy finish. Air movement helps drying, but keep heat low.
Polyester and synthetic blends: These are often the easiest to clean. A water-based upholstery cleaner usually works well, and light agitation with a soft cloth is normally safe. Still, test first. Some synthetic blends have finishes or backings that react badly to strong cleaners.
Microfiber: Microfiber is commonly used because it is hard-wearing and forgiving, but it can develop water spots if cleaned unevenly. Use a small amount of cleaner and a clean cloth. Many people like to brush microfiber gently after drying to restore the texture. That little nap can look flat if you overdo the moisture.
Wool and wool blends: Wool needs a careful touch. Use cool or lukewarm water at most, and favour wool-safe products. Avoid strong alkalis and heavy scrubbing. Wool can shrink, felt, or become stiff if treated roughly. If the item is valuable, or the weave is especially delicate, professional cleaning may be the safer call.
Velvet: Velvet is the one people worry about, and fair enough. It can crush easily. Clean lightly, use very little liquid, and brush the pile in the same direction once dry. Never soak velvet. If it develops a mark, treat it slowly and avoid pressing too hard, or you can end up with a shiny patch that catches the light in the worst possible way.
7. Blot away excess moisture
Use a clean, absorbent cloth to lift as much moisture as possible. Press down gently. Do not rub in circles. That can distort the weave or push the stain outwards. If the cloth is getting dirty, switch to a fresh one. You want to lift soil away, not shuttle it around the upholstery.
8. Dry properly and evenly
Leave cushions in a well-ventilated room and keep fabric out of direct, harsh heat. A fan or open window can help. If you can, prop cushions so air reaches both sides. Uneven drying is what causes those awkward water marks and lingering smells. On a damp evening, especially in older UK properties, it may take longer than you expect. Don't rush it.
9. Finish by brushing or reshaping the fabric
Once dry, restore the pile or nap where needed. Use a soft brush for velvet, microfiber, and some textured blends. Smooth cushion covers back into shape and check for any areas that need a second light pass. If a stain remains after drying, assess it again before repeating the process. A second gentle clean is usually safer than one heavy-handed attempt.
10. Maintain with a simple routine
Regular vacuuming, quick spill response, and occasional spot treatment will do more for upholstery than occasional panic cleaning. The aim is steady care, not heroics. A little routine goes a long way.
Expert Tips for Better Results
A few practical habits can make a real difference. First, always clean from the cleanest area toward the dirtiest, especially on large cushions. It keeps the job more even and reduces the risk of pushing soil into already marked sections. Second, use white or colourfast cloths. Bright towels can bleed dye, and that is a nuisance nobody needs.
If you are working on a sofa in a living room, do one section at a time. A cushion, an arm, the back panel. That pace lets you control moisture and drying more easily. It also stops you from losing track halfway through. We have all done the "which part did I clean first?" dance. Not ideal.
Avoid mixing cleaning products unless the label specifically allows it. Some combinations can leave residues or create fumes, and there is rarely a benefit to being adventurous here. Another useful habit is to keep ventilation steady. Open a window if you can. The room will feel fresher, and the fabric will dry more evenly.
If you are dealing with an upholstered item in a rental property or a shared home, take a quick photo before and after cleaning. It is just sensible record-keeping, especially if you are preparing for an end of tenancy clean or discussing condition with others.
Common Mistakes to Avoid
Most upholstery problems during cleaning come from a few repeat mistakes. Avoiding them is half the job.
- Using too much water: this can create rings, shrinkage, and slow drying.
- Scrubbing hard: friction can damage pile, spread stains, or roughen the surface.
- Skipping the vacuum step: dry soil turns into muddy residue once wet.
- Ignoring the care label: one wrong method can damage the fabric quickly.
- Using the wrong cleaner: strong products can fade or stiffen some textiles.
- Letting fabric dry unevenly: this often leaves marks or a stale smell.
- Cleaning only the stain: spot cleaning one tiny patch can leave a visible halo.
A small but important point: if the stain is old, unknown, or oily, do not keep adding product hoping for a miracle. That usually makes things worse. Step back, reassess, and choose the gentlest option that still has a chance of working.
Tools, Resources and Recommendations
You do not need a huge kit to clean upholstery well. In fact, too many products can complicate things. A simple, sensible set-up is usually best. If you are thinking about deeper maintenance, some homeowners compare the convenience of a professional upholstery cleaning service with the practicality of doing it themselves. Either route can be right, depending on the fabric and the level of soiling.
Useful tools include:
- A vacuum cleaner with an upholstery attachment
- Soft brushes for seams and textured fabric
- Microfibre cloths or other lint-free cloths
- A bucket or spray bottle for controlled damp cleaning
- A fabric-safe upholstery cleaner matched to the care label
- White towels for blotting and moisture control
- A fan or good airflow for drying
If you want to tackle other fabric surfaces around the home too, it can help to read more broadly about carpet cleaning and rug cleaning, since the same principles of soil removal, spot testing, and careful drying often apply. For households that prefer to leave more of the hard work to specialists, browsing domestic cleaning or deep cleaning options can also help you decide what level of support you need.
To keep products sensible and not overcomplicate things, choose cleaners that match the fabric type rather than the stain type alone. The fabric decides the limits. The stain just decides how carefully you need to work.
Law, Compliance, Standards, or Best Practice
For most homeowners, upholstery cleaning is mainly a matter of care, product safety, and practical best practice rather than regulation. That said, there are a few sensible standards to keep in mind. Always follow manufacturer instructions where they exist, because they are the most relevant guide for the item in front of you. If a fabric is marked for professional or solvent-only cleaning, treating it as a wet-clean project is risky.
In a business or rented setting, it is also sensible to consider health and safety expectations. Good ventilation, safe storage of cleaning products, and proper handling of electrical equipment matter. If you are using a cleaner in a shared property or workplace, keep products labelled, avoid over-wetting floor areas, and do not leave damp cushions where they can cause slips or odours.
For cleaning businesses and landlords, clear communication helps too. If a sofa is especially delicate, antique, or already damaged, best practice is to document its condition before cleaning. That is just good housekeeping, really. It avoids misunderstandings later and helps everyone make a more informed decision.
Options, Methods, or Comparison Table
Different upholstery fabrics respond best to different cleaning methods. The table below gives a quick, practical comparison to help you choose the safest route.
| Fabric type | Best general approach | Main risk | Good for DIY? |
|---|---|---|---|
| Cotton | Light water-based cleaning with blotting | Water marks or shrinkage if over-wet | Yes, with care |
| Linen | Minimal moisture and gentle spot cleaning | Patchiness and tide marks | Sometimes, if delicate handling is possible |
| Polyester blends | Most water-based upholstery cleaners | Residue if too much product is used | Yes, usually |
| Microfiber | Controlled damp cleaning and light brushing | Water spotting or flattened texture | Yes |
| Wool/wool blend | Cool, wool-safe cleaning with minimal agitation | Felt, shrinkage, stiffness | Only if the item is suitable |
| Velvet | Very light cleaning and careful pile management | Crushing and visible marks | Riskier; often better with specialist help |
If you are deciding between a quick refresh and a deeper clean, think about the fabric first, then the stain, then the time available. A half-hour tidy-up on a synthetic chair is a very different job from restoring a velvet sofa after a long winter of family use.
Case Study or Real-World Example
A fairly typical example: a family sofa in a London flat with a mix of everyday grime, a faint biscuit stain, and a water ring from an earlier attempt to clean it. The fabric was a polyester-cotton blend, which is manageable but not invincible. The first step was vacuuming every seam and cushion, because there was more dust in there than anyone expected. Then the stain was spot-tested with a mild upholstery cleaner in a hidden area behind a cushion zip.
Once the test area dried with no colour change, the cleaner was applied lightly in sections. The biscuit mark came up with gentle blotting and a second pass using a clean cloth. The water ring was less cooperative, so the whole seat cushion panel was cleaned evenly to blend the area rather than chasing the circle itself. That is often the trick: treat the broader section, not just the obvious mark.
By the next morning the sofa looked brighter, smelled fresher, and felt cleaner to sit on. Nothing dramatic. Just better. And that is usually the goal with upholstery care anyway. Not perfection. Just calm, clean, comfortable furniture that feels looked after.
Practical Checklist
Use this before you start.
- Check the fabric care label if one is present
- Identify the fabric type as closely as possible
- Vacuum thoroughly, including seams and creases
- Remove dry debris before using any liquid
- Test the cleaner on a hidden area first
- Choose the mildest effective product
- Blot gently rather than scrubbing
- Avoid soaking the fabric
- Work in small sections
- Allow even drying with good airflow
- Brush or reshape the fabric once dry if needed
- Stop and seek help if the fabric reacts badly
If you can tick those off, you are already ahead of most rushed DIY cleaning attempts.
Conclusion
Step by step upholstery cleaning for common fabrics is really about matching the method to the material. Once you learn the basics, the process becomes much less intimidating. Vacuum first, test first, use less moisture than you think, and dry everything properly. That simple routine protects the fabric and gives you much better results than guesswork ever will.
In our experience, the best upholstery care is steady, careful, and a bit patient. A sofa does not need to be attacked into submission. It needs respect, the right product, and a measured hand. Do that, and most common fabrics clean up nicely without drama. And yes, that is a lovely phrase to use about a sofa, but there we are.
Get a free quote today and see how much you can save.
Frequently Asked Questions
What is the safest way to start upholstery cleaning at home?
The safest start is always to vacuum thoroughly, check the care label, and test any cleaner in a hidden spot. That keeps you from pushing dirt deeper into the fabric or causing colour changes on the visible areas.
Can I use washing-up liquid on upholstery?
Sometimes a very mild diluted solution may be used on some fabrics, but it is not the best default choice. Many upholstery fabrics react better to a product made specifically for fabric cleaning, because it is easier to control residue and moisture.
How do I clean a fabric sofa without leaving water marks?
Use minimal moisture, work evenly across a section, and dry the area with good airflow. Water marks often appear when one patch gets wetter than the surrounding fabric, so consistency matters more than force.
Is steam cleaning safe for all upholstery fabrics?
No. Steam is not suitable for every fabric, especially delicate fibres like wool, linen, or velvet. Always check the care label and, if in doubt, use a gentler method or ask a professional.
How often should upholstery be cleaned?
Light vacuuming can be done weekly or as needed, while deeper cleaning depends on use. A busy family sofa may need attention more often than a spare chair. There is no single rule for every home.
What is the best cleaner for microfiber upholstery?
A fabric-safe upholstery cleaner used sparingly is usually best for microfiber. Keep the application light, blot rather than rub, and brush the fabric gently once dry if the texture looks flattened.
Can I clean velvet upholstery myself?
Small marks can sometimes be handled carefully at home, but velvet is one of the trickiest common fabrics. If the piece is valuable or heavily soiled, professional cleaning is often the safer option.
How long does upholstery take to dry?
Drying time varies with fabric, room temperature, ventilation, and how much moisture was used. Light cleaning may dry in a few hours, while heavier cleaning can take much longer, especially in cooler weather.
Why does my sofa smell worse after cleaning?
That usually happens when the fabric or padding is left damp for too long. Good airflow and careful moisture control help prevent lingering smells. If the smell persists, the padding may have absorbed moisture and need more thorough drying.
Should I clean removable cushion covers in the machine?
Only if the care label allows machine washing. Some removable covers shrink, twist, or lose shape if washed the wrong way, so the label is still the deciding factor.
When should I stop DIY cleaning and call a professional?
If the fabric is marked X, the stain is old or unknown, the upholstery is antique or delicate, or your first test changes the colour or texture, stop there. A professional cleaner can usually judge the safest next move.
Does upholstery cleaning remove all stains?
Not always. Some stains are permanent, especially if they have set, reacted with the fibres, or been treated with the wrong product before. Good cleaning improves appearance and hygiene, but it cannot reverse every mark.
Sometimes the best result is simply a sofa that looks fresher, feels better, and quietly does its job again. And that is enough.